Authentication in Next.js Apps falls into two broad perspectives
- Page authentication
- Client-side
- Server-side
- API route authentication
Before you implement any authentication, you need to have a clear understanding of what data-fetching strategy you are going to use in your app. you can read about data-fetching strategies in the following posts.
Client-side authentication is for those sites that use SSG( static-site generation ). It can combine client-side data fetching libraries such as SWR( recommended by the Next.js team ) once the user is authenticated.
Authentication on the client-side has the following pattern
- The browser sends a request to the static page on Next.js App
- The Next.js app renders an initial static-loader/loading-skeleton
- The browser sends the authentication request to the backend API route
- Based on the response, the user will be redirected to the requested page(ex: the dashboard ) or the Sign In page
Authentication with NextAuth
NextAuth.js is an open-source authentication library that supports authentication requirements in Next.js Apps. We are going to create a simple app to demonstrate how to use this library to set up client-side authentication.
setting up the development environment
- First, run
npx create-next-app next-auth-appon the terminal. - then install next-auth:
npm install next-auth
NextAuth is bundled with a variety of built-in Authentication providers, and we will be using Google authentication in our app. First, create the app. Run the following command in the terminal
Setting up the app
First of all, we are going to build a simple UI for our app.
In your project folder structure, go to the pages/ index.js.
Replace the default code generated with the code below
import Styles from '../styles/Home.module.css'
import Link from 'next/link';


function Home() {

  return (
    <div><p>Welcome, to Next.js authentication</p>
        <ul className={ Styles.nav_container }>
          <li className={ Styles.list }>
            <Link href="/">
              <a className={ Styles.nav_button }>Home</a>
            </Link>
          </li>

          <li className={ Styles.list }>
            <Link href="/dashboard">
              <a className={ Styles.nav_button }>Dashboard</a>
            </Link>
          </li>

          <li className={ Styles.list }>
              <Link href="#">
                <a className={ Styles.nav_button }>Sign in</a>
              </Link>
          </li>

          <li className={ Styles.list }>
            <Link href="#">
              <a className={ Styles.nav_button }>Sign Out</a>
            </Link>
          </li>

        </ul>
    </div>
  )
}

export default Home
In styles/Home.module.css, replace the CSS styles with the following
.nav_container{
  display: flex;
}

.bgcolor{
  background-color: aliceblue;
}

.list{
  list-style: none;
}

.nav_button{
  padding: 5px 10px;
  margin: 5px;
  border-radius: 2px;
  background-color: lightgray;
}

.loading {
  opacity: 0;
  transition: all 0.2s ease-in;
}

.loaded {
  opacity: 1;
  transition: all 0.2s ease-in;
}
Now, run the application in the development mode
npm run dev
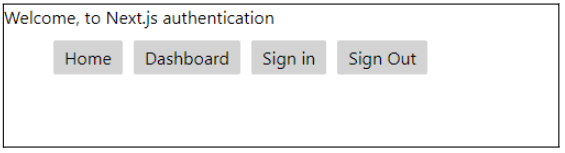
You should see a simple app with four links. This is sufficient to understand client-side authentication.
Adding Authentication provider
NextAuth.js provides four ways to authenticate users
- Using a built-in OAuth Provider (e.g Github, Twitter, Google, etc…)
- Using a custom OAuth Provider
- Using Email
- Using Credentials
In our app, we are going to use a built-in OAuth Provider. The Provider for this app is Google.
So, in short, we will be using Google authentication to authenticate the users to our app.
Setting up Google Authentication
First, create a Google account if you do not have one.
Sign in to your Google account and open the Google API console to set up credentials.
If this is your first time working with Google console to add OAuth client ID credentials, you have to add a new project in the console.
When you access the google console, google will ask you to sign in.
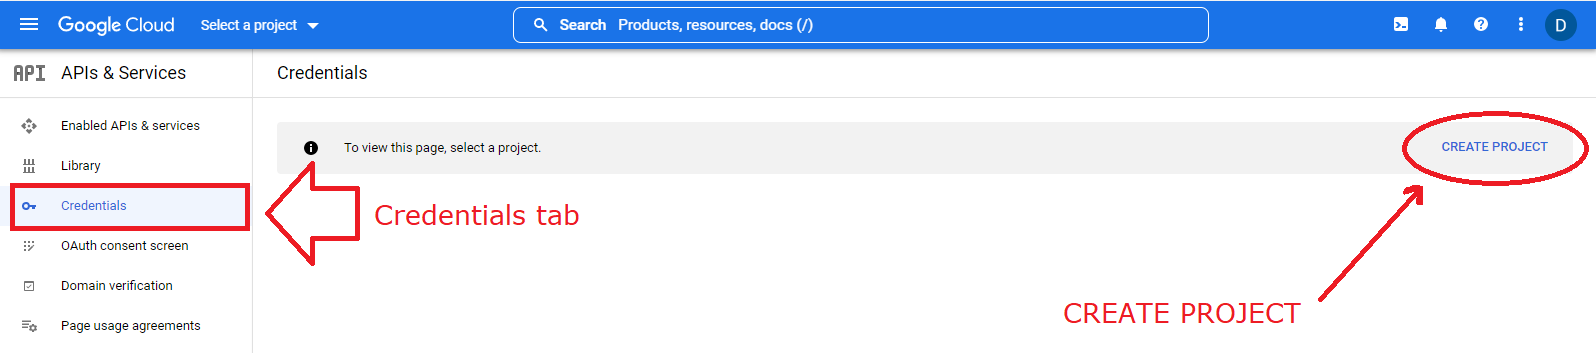
After you sign in click on the credentials tab, and you will see the above screen.
Then, click on the create project in the top right corner, which leads to the screen below. Give an appropriate name for your project. (Note: you can create up to 12 projects in the free quota Google offers ). Leave the Location field as it is and click on CREATE.

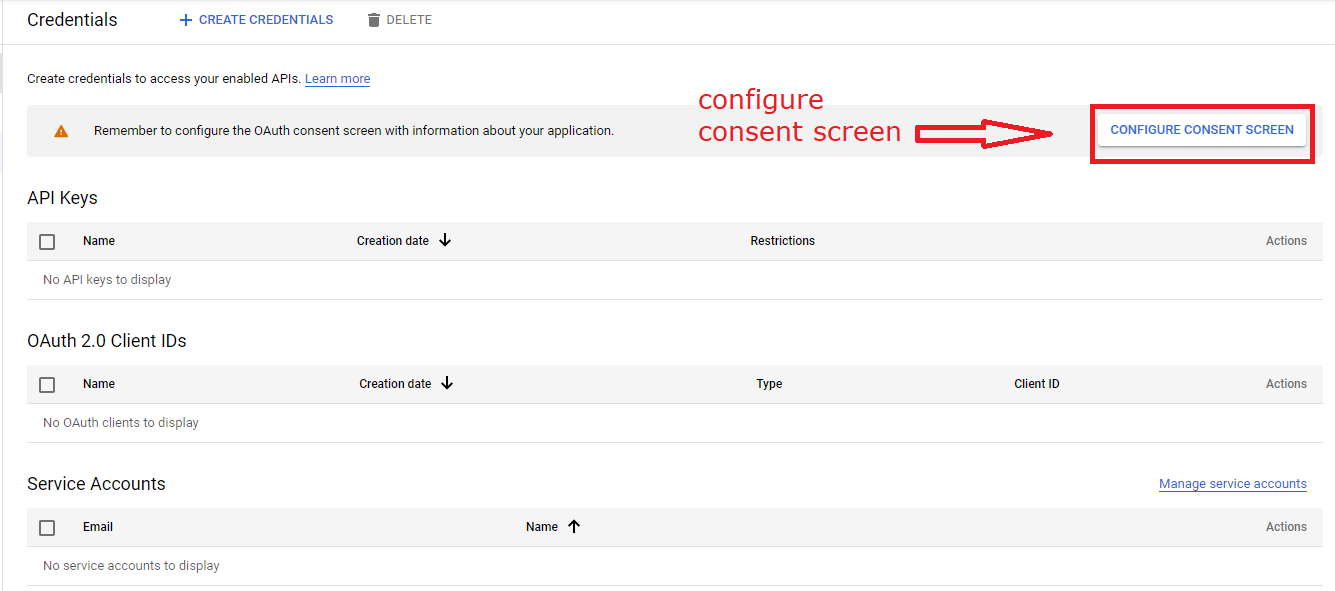
After you provide a name for your project, you will be redirected to the console dashboard. Now, you need to configure the consent screen before you add any credentials. Click on CONFIGURE CONSENT SCREEN button.

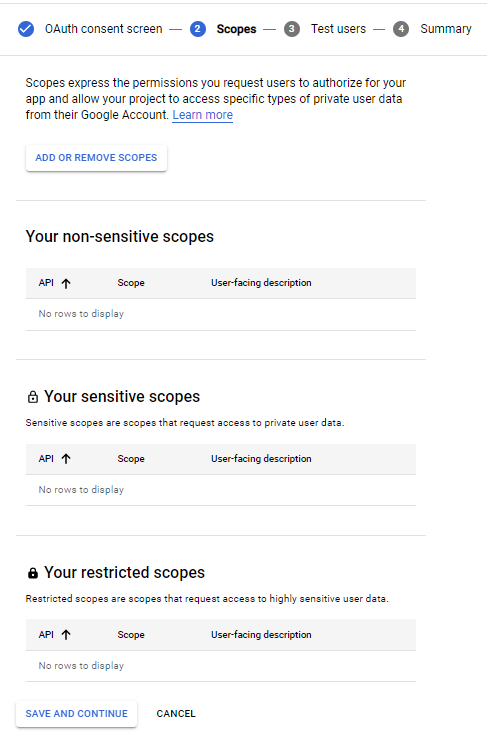
You will go through a 4-step wizard. The first step is OAuth consent. Click on External , because our app is basically for learning and testing purposes. This could be the only opinion you can choose at this level. Click on CREATE button.
After that, you need to provide App information and the email address that you use as a developer. You can fill only the required fields (App name, user support email, and developer contact information ). You can use your email for both the user support email and developer contact information.

Click on the SAVE AND CONTINUE button at the bottom.
The rest of the screen are Scopes, Test users, and Summary. These are not important for our app at this moment. There are just leave those screens as it is, continue the wizard by clicking on the save and continue button and complete it.
After you complete the OAuth consent screens, you will be directed back to the console dashboard. Now, you can add credentials.
Please, read how to add OAuth client ID credentials to add credentials.

You do not need to add “Authorized JavaScript origins” for this app. But, you need to add the “Authorized redirect URIs”. As we are working under development mode, you need to add http://localhost:3000/api/auth/callback/google as the authorized redirect URI. You can read more about this on the NextAuth documentation. After that, you can click on the CREATE button. You will be prompted with a notification with a Client ID and Client Secret. Copy these two and add them to your .env.local environment file in the project.

Setting up AuthNext for Authentication
On pages/api, create a folder named auth, and then create a file named […nextauth].js. This is a convention in NextAuth.js
Now, add the following code to the […nextauth.js]
import NextAuth from "next-auth"
import GoogleProvider from "next-auth/providers/google";

export default NextAuth({
  // Configure one or more authentication providers
  providers: [
    GoogleProvider({
        clientId: process.env.GOOGLE_CLIENT_ID,
        clientSecret: process.env.GOOGLE_CLIENT_SECRET
      }),
    // ...add more providers here
  ],
})
You also need to create a .env.local file. Add this file to the root folder ( /NEXT-AUTH-APP ) of your project. In this file, we will store the Google client Id and Client secret.
GOOGLE_CLIENT_ID= <<replace with your client id>>
GOOGLE_CLIENT_SECRET= <<replace with your client secret>>
After adding the above files, add the dashboard.js file to /pages with the following React component. This is only a demo file.
pages/dashboard.js
import Styles from '../styles/Home.module.css'
import Link from 'next/link'

export default function Dashboard(){
    return(
    <div>

        <Link href="/">
          <a className={ Styles.nav_button }>Home</a>
        </Link>
        <div><br />This is the dasboard</div>

    </div>
    )
}
Handing events in UI
Now we need to handle Sign In and Sign Out functionality. For this, we need to add on click event to sign in and sign out buttons. Change the code in the next.js file so it will appear as follows.
updated next.js
import Styles from '../styles/Home.module.css'
import Link from 'next/link';

import { signIn, signOut ,  useSession } from 'next-auth/react';


function Home() {
  const { data: session, status  } = useSession();

  return (
    <ul className={`${ Styles.nav_container } ${ ( !session && status === 'loading'  ) ? Styles.loading : Styles.loaded }`}>
      <li className={ Styles.list }>
        <Link href="/">
          <a className={ Styles.nav_button }>Home</a>
        </Link>
      </li>
      { ( session ) &&
      <li className={ Styles.list }>
        <Link href="/dashboard">
          <a className={ Styles.nav_button }>Dashboard</a>
        </Link>
      </li>

      }
      { !session  &&
        <li className={ Styles.list }>
          <Link href="/api/auth/signin">
            <a onClick = { ( e )=>{
              e.preventDefault();
              signIn();
            }}  className={ Styles.nav_button }>Sign in</a>
          </Link>
        </li>
      }

      { session &&
      <li className={ Styles.list }>
        <Link href="/api/auth/signout">
          <a onClick = { ( e )=>{
            e.preventDefault();
            signOut();
          }} className={ Styles.nav_button }>Sign Out</a>
        </Link>
      </li>
    }
    </ul>
  )
}

export default Home
We need to import the Sign In and Sign Out functions from nextAuth and call these functions when the onClick event is triggered.
It is also important to recognize the session to show and hide the Sign In and Sign Out buttons, and the dashboard buttons. On the homepage, we should show only the Home link and the Sign In buttons. After the user signs in, we need to show the Home, Dashboard and Sign Out buttons. To identify sessions the NextAuth provides a hook named useSession.
UseSession hook
useSession is the simplest way to detect a session on the client side on a Next.js app with NextAuth. You must first wrap the <Component {...pageProps} /> in pages/ _app.js with SessionProvider.
pages/ _app.js
import '../styles/globals.css'
import { SessionProvider } from 'next-auth/react';

function MyApp({
  Component,
  pageProps:{ session, ...pageProps } }) {
  return (
    <SessionProvider session={session}>
      <Component {...pageProps} />
    </SessionProvider>
  )

}

export default MyApp
useSession returns an object with key-value pairs: data and status:
- Data can take three values:
- undefined: when the session has not been fetched from the Authentication provider
- null: failure to fetch the session
- session: when the user is authenticated
- status: can have three values indicating the states of authentication.
- “Unauthenticated”: before the user is authenticated
- “loading”: during the authentication process
- “authenticated”: after the user is authenticated
Protecting dashboard route on the client side
If you did everything correctly, you should be able to access all the routes by clicking the links on the home page.
However, if someone enters http://localhost:3000/dashboard in the browser directly without signing in, he can still be able to access the dashboard. Therefore, we need to protect this page from unauthenticated access.
To do this on the client side, you can use the useSession hook. We can use the value of the status to check if a user is authenticated or not.
You can change the code in the pages/dashboard.js as follows
import Styles from '../styles/Home.module.css'
import Link from 'next/link'

import {  useSession } from 'next-auth/react';
import { useRouter } from 'next/router';
import { useEffect } from 'react';

export default function Dashboard(){
  const { status  } = useSession();
  const router = useRouter();


      useEffect(()=>{
        if( status === "unauthenticated")
        router.push('/')

      }, [status ]);


 if( status === "authenticated") {
    return(
    <div>

        <Link href="/">
          <a className={ Styles.nav_button }>Home</a>
        </Link>
        <div><br />This is the dasboard</div>

    </div>
    )
  }
}
Note: I have used the useRouter hook to redirect unauthenticated users to the login page. It is my personal choice here, but you can customize what to do with unauthenticated users as you wish. For example, you can display a message to inform them that they need to first create an account or present a link to the login page.
Summary
Authentication is a critical aspect of web apps. Next.js has a perspective on authentication: client-side, server-side, and API route authentication. We talked in this post about how to set up client-side authentication, Sign Out and Sign In functionality, and how to prevent unauthorized users keep from accessing protected routes on the client-side with NextAuth.js, an open-source library for Next.js apps.