In this post, I am going to show you how to deploy a React App to MS Azure. But, first, let us quickly see what cloud computing is.
Table of Contents
Cloud computing
Commercial Cloud computing has been around us for more than two decades. There are many cloud service providers offering a variety of services. These services can be broadly categorized into three groups.
Infrastructure as a service
IaaS Provide access to the server, storage, and networking resources via virtual machines on-demand over the internet.
Platform as a service
PaaS Provide hardware and software resources necessary for software development and deployment. Therefore, This is the service that most developers would be interested in.
Software as a service
This is probably the one we use and know when we think of cloud computing. SaaS provides software over the internet for a variety of uses such as email, storage drives, calendaring, office tools, etc.
Microsoft Azure
Azure is Microsoft’s cloud computing service provider. It provides many services on demand. Compute, web, networking, AI, machine learning, databases, internet of things, DevOps, security, storage, containers, and mobile are a few of the service categories.
In this post, I am going to focus on one of the services important to developers. That is the App services.
Before anything else, you need to create an account at https://azure.microsoft.com. You can create a free account and use Azure for 12 months. After that, some of the services will be still free within a certain limit.
Creating an App service
Before you begin any steps before, create an empty GitHub repository. Make sure to add a README.md when you create the repository so that there will be a default main branch.
Then, follow the steps below.
- Click on App Services on your Azure portal. This will open up the App Services window.

- Click on Create. It will direct you to a form wizard to create a Web App.
- Enter the Basics of the Web App. This includes
- Project Details
- Instance Details
- App Service Plan
- Zone redundancy
What is important for us now is the project Details and instance Details. Let’s filled up the required fields.

In the above form, you will see the name of your subscription.
The resource group is a way of organizing your services. One group can have many services.
Under Instance Details, enter the name
A region is a geographic location in which a cloud service provider has established its data centers. MS Azure has over 200 data centers around the world.
We are going to deploy our application later to Azure. Thus, we need to do some setting up for this. The next phase is that. Now, click on the “Next: Deployment” button.
Setting up deployment
We are going to use Github Actions for Continuous Integration and deployment. So, select “Enable” for Github Action settings.
Then, you need to authorize Azure to use your GitHub account. Click on the “Authorize” button. On the pop-up window, click on “Authorize AzureAppService”
After you have authorized, choose the Organization. If you have access to other organizations’ GitHub accounts, you will see those too. But, select the one with the name of your GitHub account.
Now, choose the empty repository, you had created before. When you choose the repository, notice Azure will automatically select the default branch of the repository.
After setting up the GitHub Account and repository, now Azure will create a Workflow file in your GitHub account. WorkFlow file is a YAML file( .yml extension) with GitHub Actions.
You can preview the file if you need to. We are going to make some changes to this file later for CI/CD configuration.
That is all we need at the moment. Now, click on the “Review + Create” button at the bottom wizard.
Now, you will see a summary of the data you entered. You can go back and make any changes if you have done any mistakes. If you think everything in the summary is correct, click on the “Create” button.
It should take some time to create and deploy your app. Please be patient.
After the deployment is completed, click on the “Go to resource” button.
Pay attention to the overview of your application. It has the URL and the GitHub repository.
Click on the URL and see what the default page looks like.
you can also check out the repository you selected on Github. There must be two files now. The ReadMe file and the Workflow file in “.github” folder.
Create a react app with create react app
- Open your terminal and clone the GitHub repository.
git clone https://github.com/dineshigdd/react-sample-app.git- Change the directory so that you are in the root folder of the project.
cd react-sample-appIf you use npx create-react-app . (create-react-app with a dot) , it will make the current folder the root folder of the React Project. However, this approach produces a conflict with the .github directory and produces the following error.
The directory. contains files that could conflict:
  .github/
Either try using a new directory name, or remove the files listed above.
- Therefore, use create-react-app to create a React project in a separate folder(ex: sample ), and then we are going to copy only the necessary files from that folder to the react-sample-app folder, which is the folder with the .github folder in which you have a YAML file with GitHub actions.
npx create-react-app sample // creating React app in a sample folder- Open the sample folder, and copy and paste all the folders EXCEPT node_modules and README file to the react-sample-app ( our project folder with .github) folder.
- Now go to the react-sample-app folder in the terminal and install node_modules with npm install.
- After node_modules are installed, start the project with npm start to see if the app is working
- You can change the name field of the package.json file to the name of the application, which is react-sample-app.
Deploying to Azure
You can build a production build of the React app and deploy it on the server locally with the following commands in the terminal.
npm run build
npm install -g serve
serve -s build
When you run npm run build, it will create a build folder. This folder contains all the static resources and the index.html file. This is the folder that we are going to deploy.
But, with the above commands, you build and deploy in your system. What we need to do now is to build and deploy our application to Microsoft Azure. How to do that?
We are using YAML file with GitHub actions exactly to do that job.
MS Azure creates a YAML file with default GitHub actions needed to build and deploy the React project. But, we need to make some changes so that the building and deploying process will be faster.
Edit YAML file
Open the project folder in your favorite code editor.
Expand the .github folder, and open the workflow file (ex: main_react-sample-app.yml)
When we build and deploy the React application to Azure, it takes some time. This time can considerably increase as you add more code and any other resources such as images. Therefore we need to make compress the build folder(make a zip file ) in the production server.
Make the following changes in the YAML file. I have added comments where you need these changes.
# Docs for the Azure Web Apps Deploy action: https://github.com/Azure/webapps-deploy
# More GitHub Actions for Azure: https://github.com/Azure/actions

name: Build and deploy Node.js app to Azure Web App - react-sample-app

on:
  push:
    branches:
      - main
  workflow_dispatch:

jobs:
  build:
    runs-on: ubuntu-latest

    steps:
      - uses: actions/checkout@v2

      - name: Set up Node.js version
        uses: actions/setup-node@v1
        with:
          node-version: '16.x'

      - name: npm install, build, and test
        run: |
          npm install
          npm run build --if-present
          npm run test --if-present
        #zip artifact
      - name: Zip artifact for deployment
        run: zip release.zip ./build/* -r #get files and folder in build folder and
                                          #compress into release.zip with linux zip command
      - name: Upload artifact for deployment job
        uses: actions/upload-artifact@v2
        with:
          name: node-app
          path: release.zip #add release.zip to path

  deploy:
    runs-on: ubuntu-latest
    needs: build
    environment:
      name: 'Production'
      url: ${{ steps.deploy-to-webapp.outputs.webapp-url }}

    steps:
      - name: Download artifact from build job
        uses: actions/download-artifact@v2
        with:
          name: node-app

      #unzip artifact when deploying
      - name: Unzip artifact for deployment
        run: unzip release.zip  #Extract release.zip with unzip command

      - name: 'Deploy to Azure Web App'
        id: deploy-to-webapp
        uses: azure/webapps-deploy@v2
        with:
          app-name: 'react-sample-app'
          slot-name: 'Production'
          publish-profile: ${{ secrets.AZUREAPPSERVICE_PUBLISHPROFILE_E88Z7UD3EE54C5F9E8A9F0CJAFFA0 }}
          package: .
if you are curious about what artifact( a package management solution integrated into Azure DevOps ) is in the YAML file, you can read it here.
After you make the following changes run the following git commands in the terminal.
git add .
git commit -am "add files and make CI/CD changes in YAML"
git push // also git push origin main
If you can go to the repository related to the project, and click on the Action button ![]()
You will see all workflows. There, you can see your git commit. Click on the git commit. Then, you will be able to see the project is building. If you click on the build link, you can see all the steps in the building process. When the building process is successfully completed, the deploying process starts. You can see all the steps running if you click on the deploy link. When the build and deploy completed successfully, you will see it below with the URL of your App.

Click on the URL and see if you can see the spinning React logo.
Oops…..I guess no.! Why is that?
This is because we need to set up the path for the start-up file. In React Apps it is the index.html file.
Let’s see how to do that.
Setting the path to the build folder
- Go back to your App service on Azure and select the web app you created.
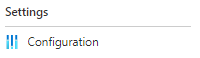
- Click on Configuration under Settings on the left sidebar.
- This will show the configuration related to the app.
- Select the General Settings tab
- Under Stack Settings, enter the following command in the Startup Command field.
![]()
- Make sure to save the changes.
- Now, click on Overview on the sidebar. This will show you the overview of your app. Notice there is a button(Restart on the top bar ) to restart the server. Click on it.
- Click on the URL. It could take some time to render. You should see the default page for create-react-app with the Spinning logo of React.
Final thoughts
I hope you learn this post is useful for you. At least basic knowledge of Cloud computing tools is essential for developers. Please leave your comments so that I can learn from you as well.