In my previous posts on React Router, I have explained to you about Basic React Router and Nested React Router. In this post, I will show you how to create custom Routes that will limit access to certain components in a React app. We are going to create a super simple app while discussing the concepts behind it. I will encourage you to read my post on Basic React Router before you complete this tutorial post.
Table of Contents
App Structure
Parent component: App
Child components: Home, Contact, Login, Dashboard, Users
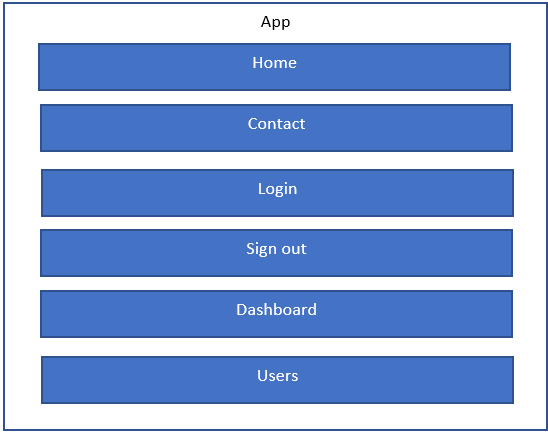
In order to understand Auth Routes in React Route, all you need is two Routes, but I created additional components for the purpose of understanding the topic better.
Create React App
- Create a React App with create-react-app
- Create three folders in the src folder: Components, Auth, Routes
- Create a file called DemoComponents.js in the Component folder, and then create the following components in the file.
- Home
- Dashboard
- Users
- Contact
Note: The file structure is my personnel preference. It is not necessarily related to creating Auth Routers
//DemoComponents.js

import React from 'react'

 function Home() {
    return <h2>Home</h2>;
}

 function Dashboard() {
    return <h3>Dashboard</h3>
}

 function Contact() {
    return <h2>Contact Us</h2>
}

function Users() {
    return <h2>Users</h2>
  }


export { Home, Dashboard , Contact, Users };- Create Two files in the Auth Folder
- AuthContext.js
- FakeAuth.js
//AuthContext.js

import React from 'react';
const AuthApi = React.createContext();
export default AuthApi;
//FakeAuth.js
export const fakeAuth = {
isAuthenticated: false,
authenticate(cb) {
this.isAuthenticated = true
setTimeout(cb, 1000) // fake async
},
signout(cb) {
this.isAuthenticated = false
setTimeout(cb, 1000) // fake async
}
}The AuthContext.js contain React Context. It is to manage the state of the components when the user is login. Creating Auth Routes and React Context have no direct relationships. What I mean here is that you do not necessarily need the knowledge of Context or implementation it to create Authenticated React Routers.
Although We use the term Authenticated React Router, React Router itself does not provide any function for the Authentication process. It is mainly a navigation system operated at the front end of the system( or on the client-side). Authentication happens on the server-side of the system. Because my focus in this post is not about authentication in this post, I created a simulated authentication function in the FakeAuth.js file.
Creating private/protected Routes
- Now, we are going to create a private route in the Route Folder. Create a file and name it PrivateRoute.js.
import React from 'react'
import { Redirect, Route } from 'react-router'
import { fakeAuth } from '../Auth/fakeAuth';

export default function PrivateRoute({ children, ...rest }) {

    return (
      <Route
        {...rest}
        render={({ location }) =>
           fakeAuth.isAuthenticated ? (
            children
          ) : (
            <Redirect
              to={{
                pathname: "/",
                state: { from: location }
              }}
            />
          )
        }
      />
    );
  }
The private or protected route is the most important component in this application. It is the one that restricts access to certain routes or components. In our application Dashboard and Users are in protected routes. The above code implements a custom Route called PrivateRoute to restrict access to Dashboard and Users. We would later use this custom Route in App.js as follows:
<PrivateRoute path="/dashboard">
    <Dashboard />
</PrivateRoute>


<PrivateRoute path="/users">
    <Users />
</PrivateRoute>
The private route, first, checks if the user is authenticated. If he is, then it will render the child component, otherwise, it will redirect the user to “/”.
children and spread syntax
“children” is a special property. It will render anything inside the child component. Read more on children prop here.
In addition, here the destructuring is used in handling props. Therefore, you can use the prop children as “children” instead of “props.children”.
“…rest” is used to pass other properties available to the rendered component if the user is authenticated. learn more about the spread syntax here.
I suggest you to console.log( children) and console.log(rest) to see what props are available.
Redirect component
Redirect is a React Router component that will redirect the user from the current location to a new location, based on values in the “to” prop. In the code above “to” prop is an object.
The pathname property inside the object specifies the location to redirect. In this case, the user is redirected to the home page/ login page ( or ‘/’) if the user is NOT authenticated.
We will be using the state property(you may use any name, but recommended you stay with the convention) on the login page. I will explain them later in the post.
read more on to: object
Create Login and Sign out components
- Create the following two files in the Components folder
- Login.js
- Signout.js
//Login.js

import React, { useState   } from 'react'
import { Redirect,  useLocation } from 'react-router';
import { fakeAuth } from '../Auth/fakeAuth'
import AuthApi from "../Auth/AuthContext";

export default function Login() {
    const Auth = React.useContext( AuthApi );
    const [redirectToRoute, setredirectToRoute] = useState( false );
    const { state }  = useLocation();

    let message = '';


    switch(state?.from.pathname){
      case '/dashboard': message = 'You must log in view the Dashboard';
      break;

      case '/users': message = 'You must log in to view Users';
      break;
    }

    if( setredirectToRoute ){
        return <Redirect to={ state?.from }/>
    }


    const login = () => fakeAuth.authenticate(() =>{
      Auth.setAuth(true)
      setRedirectToReferrer(Auth );
    });


  return (
        <div>
          <p>{ message }</p>
          <button onClick={ login }>Log in</button>
        </div>
   )
}
Now, let’s deep dive into the Login component. The use case of the above code is:
1.) A user clicks on the login button( the user gets authenticated at this moment)
2.) Redirect the user to the path that he had tried to go just before he clicks on the login button
If the user attempt to go to Dashboard or User views, which are on protected routes at ‘/dashboard and ‘/users’, before he is authenticated and a message will display asking the user to login. This is what it does with the switch statement in the above code.
useLocation hook
The switch statement uses the state object which gets its values from useLocation hook. UseLocation is custom in React Router. Its returns the location object. Take a look at the code snippet below.
<Redirect
        to={{
              pathname: "/",
              state: { from: location }
           }}
/>
This is part of the PrivateRoute.js. The state property here has an object: { from: location }. You must use the same name in const { state } = useLocation() part in the Login.js.
Redirect the user
if( setredirectToRoute ){
        return <Redirect to={ state?.from }/>
}
The if statement here has setredirectToRoute which holds the state of the login component. It is set to false for unauthenticated users. When the user clicks on the login button this state is set to true. Take a look at the code below
const login = () => fakeAuth.authenticate(() =>{
      Auth.setAuth(true) //set context to true
      setRedirectToReferrer(Auth );
    });
As I mentioned before, I use the React Context API because I want to hold the state of the user so that I can check if the user is logged in or not. Then, I use this Context in the Signout.js. This part is necessary to understand what Auth React Router is. I did this part only for the compilation of the application. You may change the above code as follows:
const login = () => fakeAuth.authenticate(() =>{
      setRedirectToReferrer( true);
 });
If you change like this, make sure to change the code in Signout.js or you can remove Signout.js from the application and the code related to that from App.js. Of course, then you will not have the Signout button or its functionality in the application.
So, this is all you need to understand the Auth React Router. Basically, all you need is to know how to implement a custom Router in React Router.
Signout component
//signout.js

import React from 'react'
import { useHistory } from 'react-router'
import { fakeAuth } from '../Auth/fakeAuth'
import AuthApi from "../Auth/AuthContext";

export default function Signout() {
        const history = useHistory()
        const Auth = React.useContext( AuthApi );

        return (fakeAuth.isAuthenticated )
          ? <p>
             Welcome! <button onClick={() => {
               fakeAuth.signout(() => history.push('/'));
               Auth.setAuth(false)
              }}>Sign out</button>
            </p>
          : <p>You are not logged in.</p>
}
Signout. js an extra step that you can go. The code uses useHistory hook that returns the history object. We need it here to use the push function of the history object. What it does here is after the user clicks on the “Sign out” button, we redirect the user to the home page and login views. Both these views are at “/”. In addition, it says the Auth context to false, which had been set to true when the user click on the login button.
If the user is not authenticated, it returns a message: “You are not logged in.”
Wrapping the componets in App.js
Now, finally, let’s look at the parent component App.js
import React from "react";
import {
  BrowserRouter as Router,
  Switch,
  Route,
  Link
} from "react-router-dom";

import './App.css'

import Login from "./Components/Login";
import Signout from "./Components/Signout";
import { Home, Dashboard , Contact , Users} from './Components/DemoComponents'
import PrivateRoute from "./Routes/PrivateRoute";
import AuthApi from "./Auth/AuthContext";


export default function App() {
  const [auth, setAuth ] = React.useState( false );
  return (
    <AuthApi.Provider value={{ auth, setAuth }}>
    <Router>
      <div>
       <Signout />
        <nav>
          <ul>
            <li>
              <Link to="/">Home</Link>
            </li>

            <li>
              <Link to="/dashboard">Dashboard</Link>
            </li>

            <li>
              <Link to="/users">Users</Link>
            </li>

            <li>
              <Link to="/contact">Contact</Link>
            </li>

          </ul>
        </nav>

        <Switch>
            <Route exact path="/">
                <Home />
                <Login />
            </Route>

            <PrivateRoute path="/dashboard">
                <Dashboard />
            </PrivateRoute>

            <PrivateRoute path="/users">
                <Users/>
            </PrivateRoute>

            <Route path="/contact">
                <Contact />
            </Route>

        </Switch>

      </div>
    </Router>
    </AuthApi.Provider>
  );
}
The most important part of this above code is how you use the private routes. As you can see the Dashboard and Users are wrapped in the <PrivateRoute> route. The rest of the routes are in <Route>. <AuthApi.Provider> is there because I use React Context. As I mentioned before it has no direct relationship with React Router implementation.
Last Thoughts
I hope you have enough understanding to implement your own custom route for restricted routes. I put the Home component and login component in the same route (“/”). you may move login component to another route(ex: “/login”). But, then make sure to change the relevant code in the PrivateRoute.js and Login.js. Please feel free to do your experiments with the code because that’s where the real learning comes from.