Table of Contents
What is on-demand ISR?
On-demand ISR is a new feature added to the existing incremental static regeneration ( ISR ) in Next.js. Using ISR developers can reduce build-time in SSG. And most importantly, updating the cache periodically at a previously specified interval can resolve the issue of showing stale data on web pages.
Although ISR is a successful approach, it does not eliminate the issue of showing stale data on static sites entirely. To answer this issue, Next.js added a new feature to ISR. This new strategy is called On-demand ISR or On-demand revalidation.
Why do you need on-demand ISR?
ISR updates the cache based on a specified period set on the Revalidate prop of the object returned by the getStaticProps function. When a user refreshes a page, after the specified interval in the revalidate prop, he will see the new information based on the updated data in the cache.
However, The drawback of this traditional ISR is that if the user refreshes a page during the revalidation period and/or just before the cache updates, he can still see stale data. The on-demand ISR, introduced as a beta version in Next.js v12.1.0 and as a stable version with Next.js v12.2.0, addresses exactly this issue. Next.js let developers manually or automatically, with a webhook, update the cache for a specific page when there is an update on the data source. That means users do not need to wait a certain period to see the new data on pages.
How to implement on-demand ISR
We are going to understand on-demand ISR by implementing a small application.
- Open the terminal and run npx create-next-app demo-next-app
- Open the project folder in your favorite editor
- Create a products folder in the pages folder. Then add an index.js file in the products folder
- Add the following code to the index.js file
import Link from 'next/link';

function ProductList( { products }){
    return(
        <>
            <h1>Our Products</h1>
            {
                products.map(
                    product =><div key={ product.id }>

                        <Link href= { `products/${product.id}`}>
                            <li><a>{ product.name }</a></li>
                        </Link></div>

                 )
            }
        </>
    )
}

export default ProductList


export async function getStaticProps(){

 const response = await fetch('https://62fc79a81e6a530698a7479c.mockapi.io/products');
        const data = await response.json();

        return {
            props:{
                products: data,
            },

        }
}
In the above code, I have used a live mockup API from mockapi.io
You need to create a custom API to understand on-demand ISR in this guide. This way you can change the data and see how those changes appear on the pages.
Use this guide to create a mock API at mockapi.io.
6. Now you need to create a dynamic route. Add a [productId].js file in the products folder, and add the following code.
export default function Product( { product }){

    return(
        <>
            <h1>{ product.name }</h1>
            {

             <div>
                <p>{ product.description}</p>
                <p>${ product.price }</p>
             </div>

            }
        </>
    )
}

export function getStaticPaths(){

        return {
            paths:[{ params:{ productId: '1' }  },],
            fallback:'blocking'
        }

}


export async function getStaticProps( context ){
     const { params } = context;
     const response = await fetch(`https://62fc79a81e6a530698a7479c.mockapi.io/products/${params.productId }`);
     const data = await response.json();

    return {
        props:{ product: data, },
        revalidate:60//60 seconds
    }
}
7. In the above code I have intentionally set the revalidation prop to 60 seconds. When you are using on-demand revalidation, it is not necessary to specify a value for the revalidate prop. If you do not set it, the revalidate prop will be set false by default.
Creating an environment variable
In production, you must have a secret token set in an environment variable to access the revalidation API in your Next.js app. The purpose of this token is to prevent unauthorized access to the revalidation API route. In Next.js, you can set environment variables by adding them to a file named .env.local.
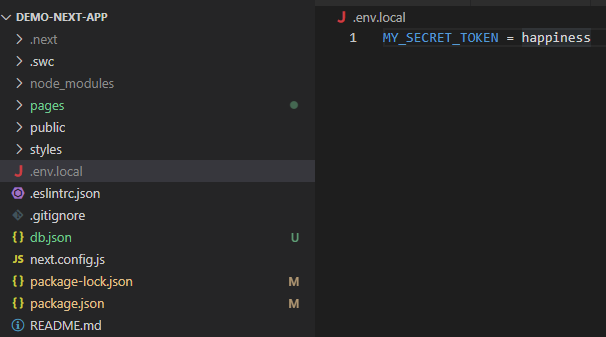
therefore, create that file in the root folder ( demo-next-app ) of your project.
In the .env.local file enter MY_SECRET_TOKEN = happiness
Adding the revalidation API Route
This revalidation API route is what makes on-demand revalidation different from the traditional ISR.
- Create a file named revalidate.js in pages/api folder.
- Add the following code
export default async function handler(req, res) {
    // Check for secret to confirm this is a valid request

    if (req.query.secret !== process.env.MY_SECRET_TOKEN) {
      return res.status(401).json({ message: 'Invalid token' })
    }

    try {
      // this should be the actual path not a rewritten path
      // e.g. for "/products/[slug]" this should be "/products/1"
      await res.revalidate('/products/2')
      return res.json({ revalidated: true })

    } catch (err) {
      // If there was an error, Next.js will continue
      // to show the last successfully generated page
      return res.status(500).send('Error revalidating')
    }
  }
If you are authorized, the res.revalidate() will execute for the specific path. To understand the topic, I set the path to the product with id 2. Therefore, when we update the record of product id 2, it should change the associated page. I will help you test this step by step.
Testing on-demand revalidation
Assuming that you have not made any errors in the above code, build the application by running npm run build
Then start the app with npm start
Test 1
Access the route http://localhost:3000/products
Got to the Rest API on mockapi.io and makes some changes to product 1( or any other )
Refresh the page. You will not see any changes because the revalidation prop is false ( by default ) for this page.
You may call the revalidation API ( http://localhost:3000/api/revalidate?secret=happiness ) on the browser, and again refresh http://localhost:3000/products. Still, you will see that there is no change because the relvalidate() function is not set to /products ( i.e await res.revalidate('/products') ).
Test 2
Now, click on product 2 ( the second item in the list ). The URL will change to http://localhost:3000/products/2. This is the route we set in the revalidation API.
Now, go to the Rest API on mockapi.io
Change the price or name of the product 2.
Refresh the page at http://localhost:3000/products/2.
Do you see any change?
I guess No. What do you think is the reason?
As you might be aware that we set the revalidation prop to 60 seconds. Therefore, you will not see any changes on this page at least until you pass 60 seconds after updates in the data source.
Test 3
Now make another change in product 2
This time, call the revalidation API on your browser by entering http://localhost:3000/api/revalidate?secret=happiness ( Note: you can open another tab in the browser to make this API call )
The browser should display { “revalidated”: true } with this API call.
Now, within 60 seconds, refresh the page at http://localhost:3000/products/2
You can see this time the page updates according to the changes made in the data source. It revalidates on your demand, and you did not need to wait until the 60 seconds pass.
Last thoughts
At the moment of writing this post, revalidate() in Revalidation API takes only one route ( path ). Therefore, you may dynamically assign a path to this parameter. This way, you may validate more than one path for other requests ( at different times). I will let you experiment with that. At production, a webhook can be used to automate the requests to the revalidation API.
When using on-demand revalidation, is it possible to call `res.revalidate` multiple times through one API handler, for example, can we put these ones near another inside one API handler:
res.revalidate(`/blog/${slug}`) ;
res.revalidate(“/blog”);